Deep Teal Bedroom Update
Looking back at the room from 2013


Looking back at the room from 2013
Aside from a down and dirty paint job on a super spooky small bedroom, the third floor was the first room we tackled when renovating the house. Originally, we decided to save our efforts (and dollars) to put towards moving forward on the deli. As we realized that timeline was becoming more and more abstract, our imaginations took over and we slowly began undoing the previous home owner’s years of bad paint choices.
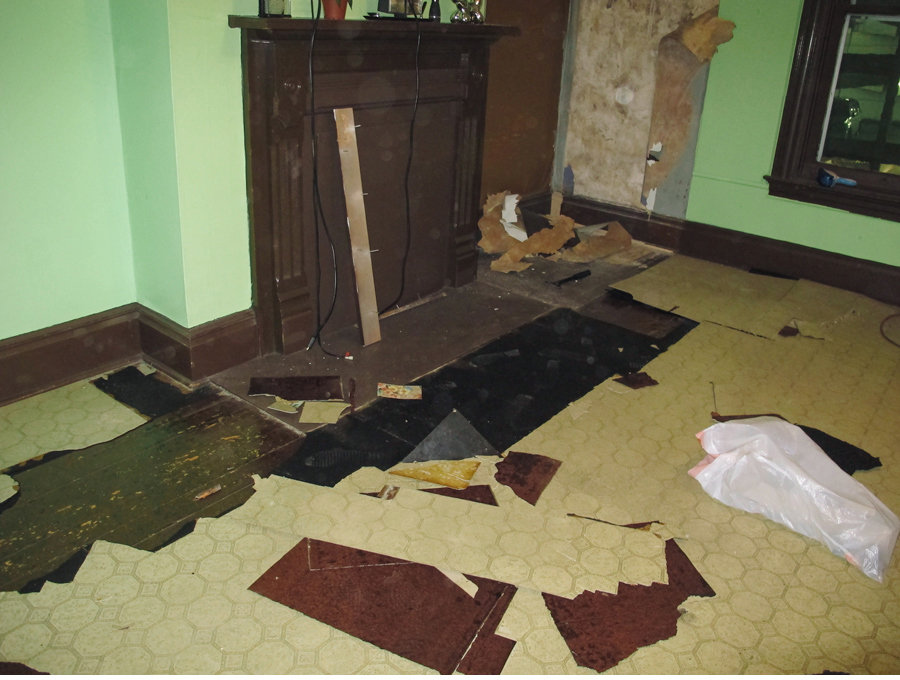
Nearly the entire house was covered in linoleum, but this sickening green was reserved for the third floor. After successfully wearing Ed down, he agreed to convert the front room into an office. Focusing most of our efforts installing shelving and a floating walnut desk, we didn’t put a whole lot of thought into color and grabbed a neutral beige on the fly at Home Depot. We kept some of the “charm” of the original wall color by opting for one of the brightest hues we could find for the fireplace: Intense Teal.
We realized the dire shape of the walls on that first go round, but the inital paint job was such a drastic change that we were estatic with our results at the time. And for the next few years the room served as an office / studio, where we predominantly stared at our computer screens toward a single a wall.
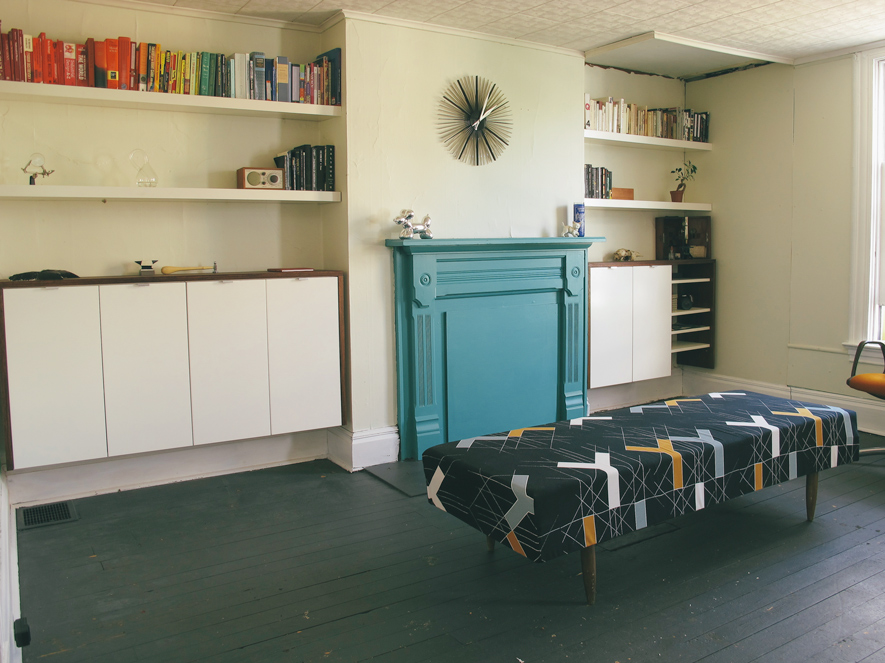
Read about our first round of renovations on this room HERE
A combination of neurosis and practicality, our living room has shifted forms and geography over the last few years, eventually taking up residence in this space. As my gaze continued to settle on the troubling exterior wall, eventually we decided it was time for another refresh.
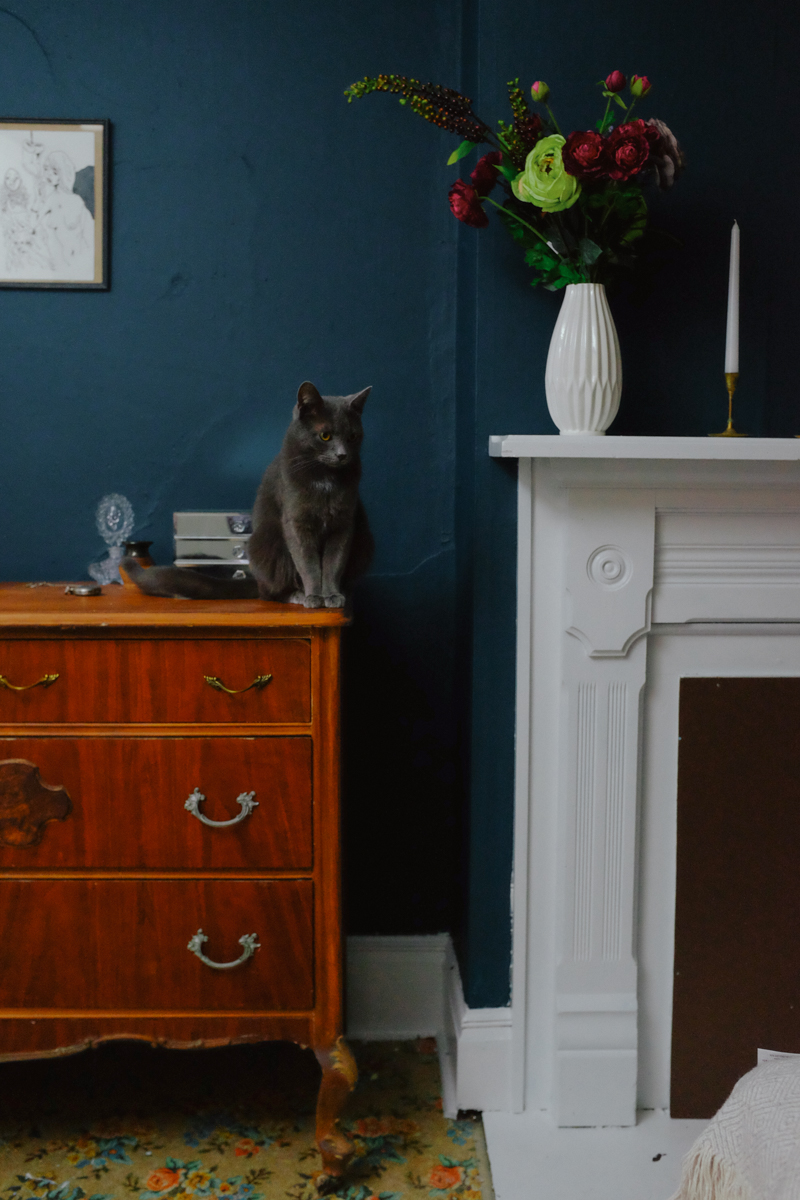
While I still dream of painting every room pink, age and Ed have me gravitating more towards shades of grey. The “neutral beige” had not grown on us, and in low light still echoes the original green we were trying to hide. The ceilings on this level of the house are about 2 feet lower than our first floor, so wanting to make the room feel more open, we opted to whitewash the room. We removed the bizarre hodgepodge of masonite they had used to “smooth” the exterior wall, and Ed secured the loose plaster and skimcoated the room.
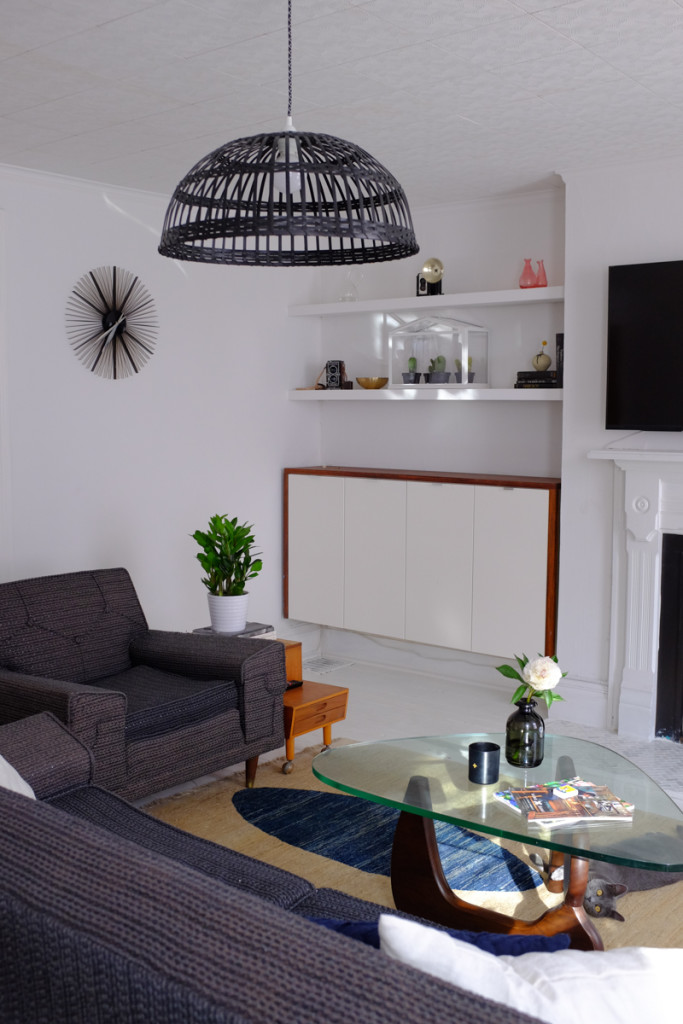
The cast iron coal fireplace had been hiding behind a plywood board all along! We matched the black and carried it out along the surround with Sherwin Williams Caviar. The rest of the room got a few coats of Sherwin William Snowbound, the walls in flat, the mantle and trim in semi gloss, and the floors in a high gloss floor paint. Unfortunately their store hours didn’t line up with our schedule, otherwise still #benjaminmooreforlife.
Tiling the hearth, we stuck to a basic carrera herringbone from Home Depot. More detail shots to come, but definitely more of a struggle than we anticipated as Ed has freshly completed his sister’s back splash.
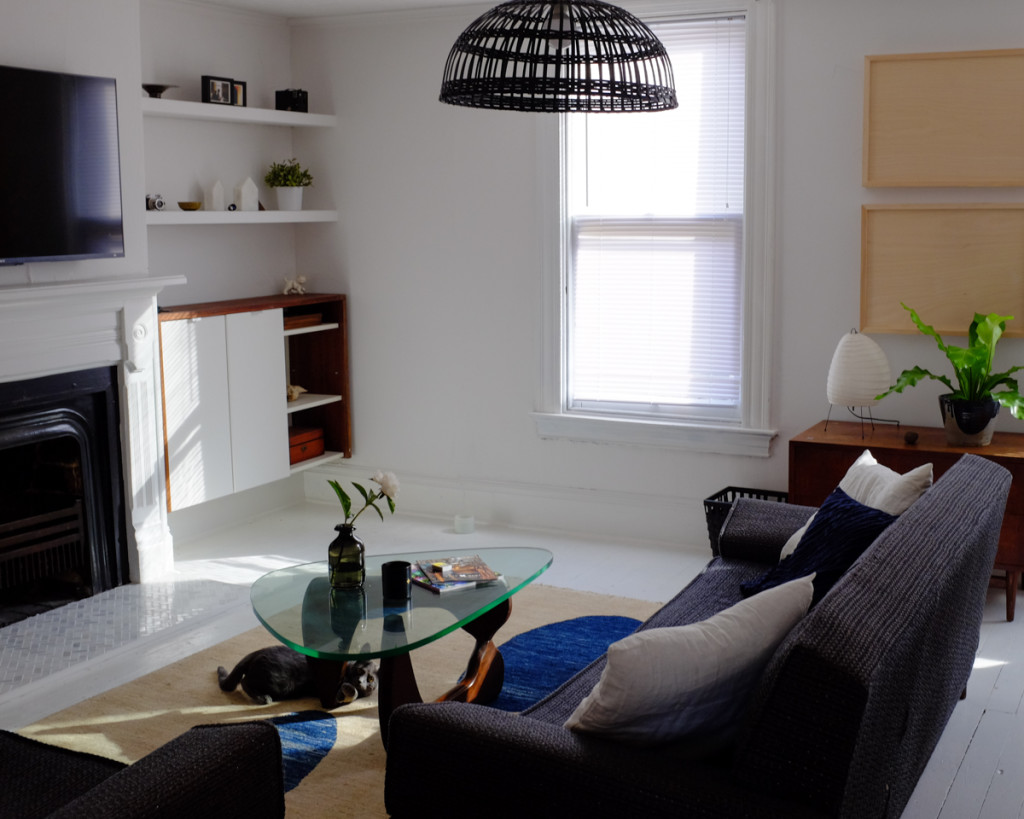
We’re still working on finalizing wall art and tweaking some of the accessories, but overall super pleased with space!
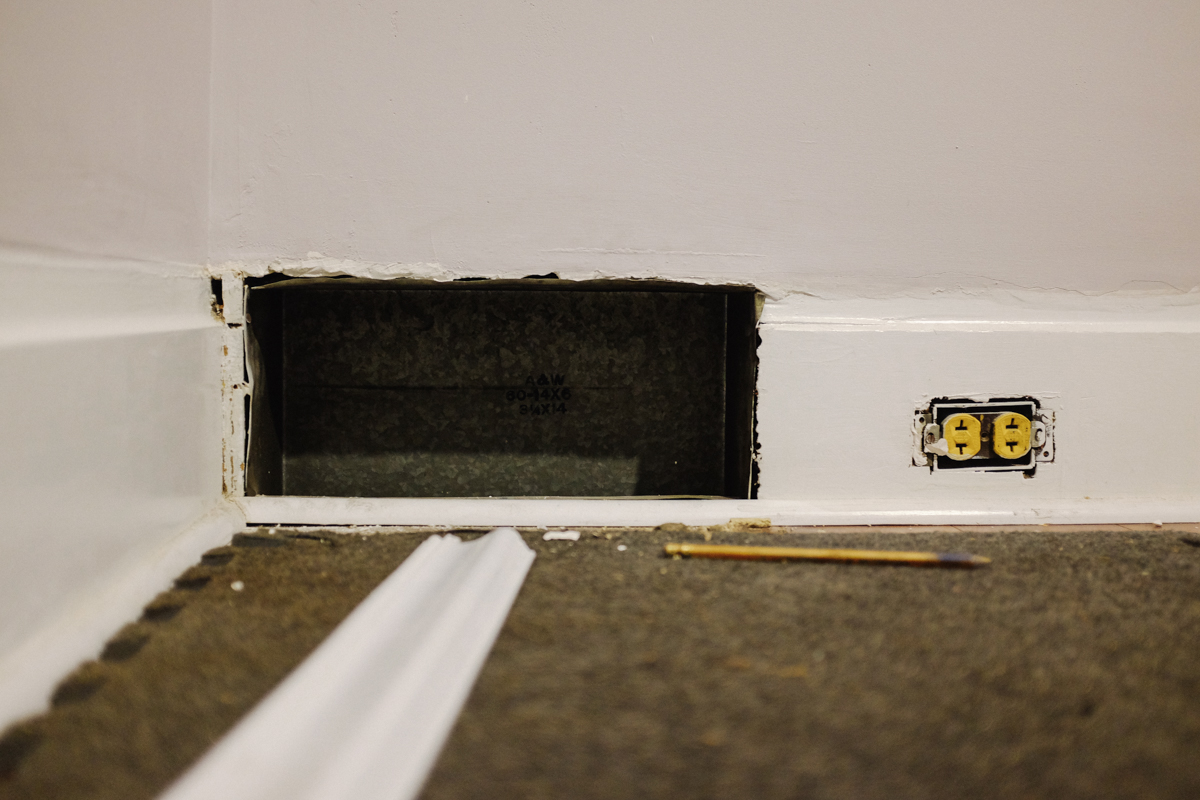
I was never crazy about the vent covers for our baseboard vents, but we ended up having to get creative when it came time to replace them once we got to work on molding. When we had our walls plastered on the first floor, we ran into some problems afterward finding baseboard caps because of the way the walls covered the ledge of the bottom panels. We also lost about an inch between the original sub floor and the bottom of the vent once we installed our flooring. With quarter rounds in place and the new caps for the baseboards ready to go on, we decided to make custom vent covers that would blend seamlessly with the rest of our trim.
Luckily, we have shut off knobs in our basement for all of the vents in the house, so we could make simple screens to cover the vents without losing any of the functionality of removing the adjustable covers. We picked up a few 6′ pieces of 1/2″ decorative molding, a panel of metal sheeting, and some super glue from Home Depot and got to work.
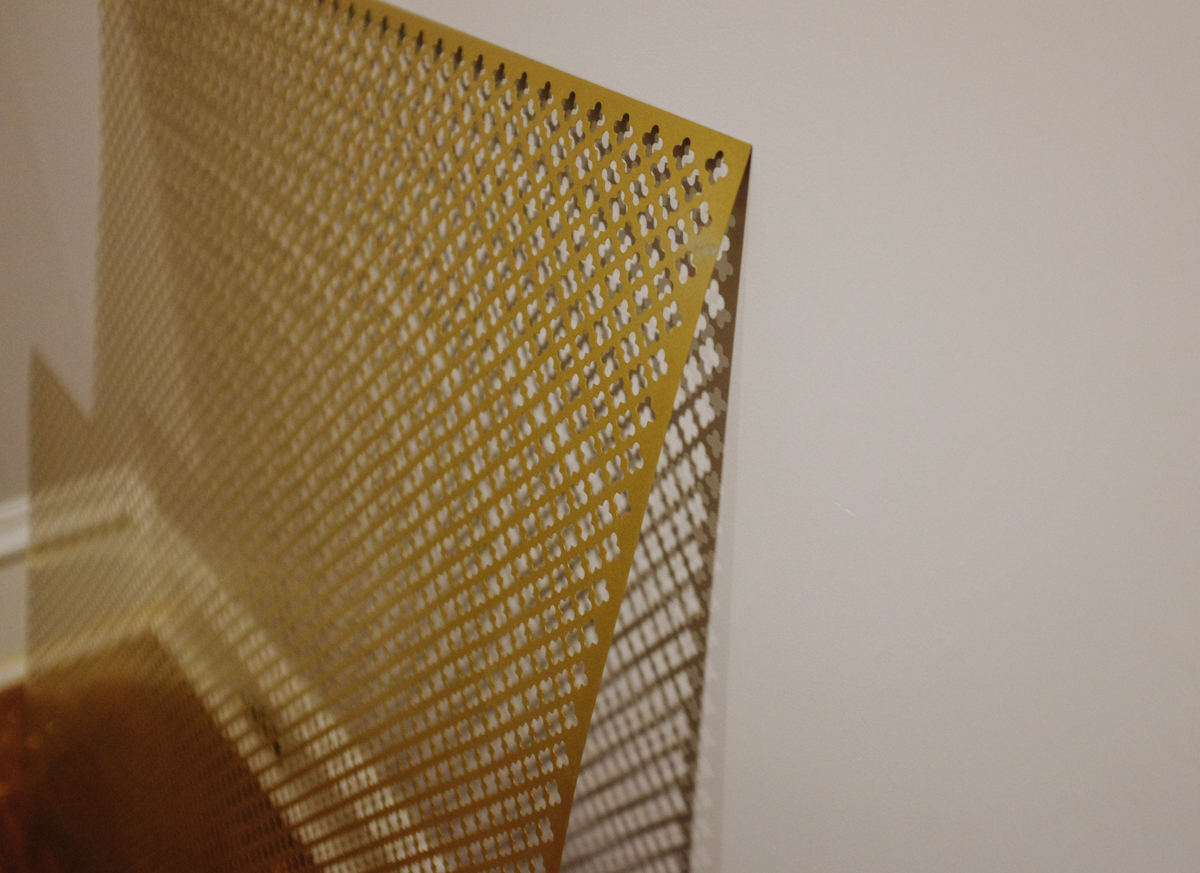

Measure twice, cut once. The edges around the vent were in pretty rough shape in our case, so we had to be pretty careful before making our cuts to ensure that we weren’t exposing any wonky plaster once the covers were in place. I cut the pieces on a 45 degree angle and simply glued them to create a frame. Like the corners in the crown molding, try and get the corners as exact as possible, but you can always fill in any gaps with caulk before painting. I then cut the decorative sheeting to fit within the frame with a pair of heavy tin snips. You may get some curling along the edges, just snip these off after you get the general shape so the sheeting will lie flat against the frame. I also found that using some flat thumbtacks to hold the screen in place while gluing was a huge help.
The superglue took quite a bit longer to dry than I expected. I would let them set up for at least 20 minutes before attaching them to the wall. After they feel sturdy and we were sure the sheeting was tightly in place we nailed them directly to the baseboard with a brad nailer.